How to convert video to audio on iPhone
Import a video, choose M4A or WAV, select an audio quality, convert it locally, and share the saved audio from iPhone or iPad.
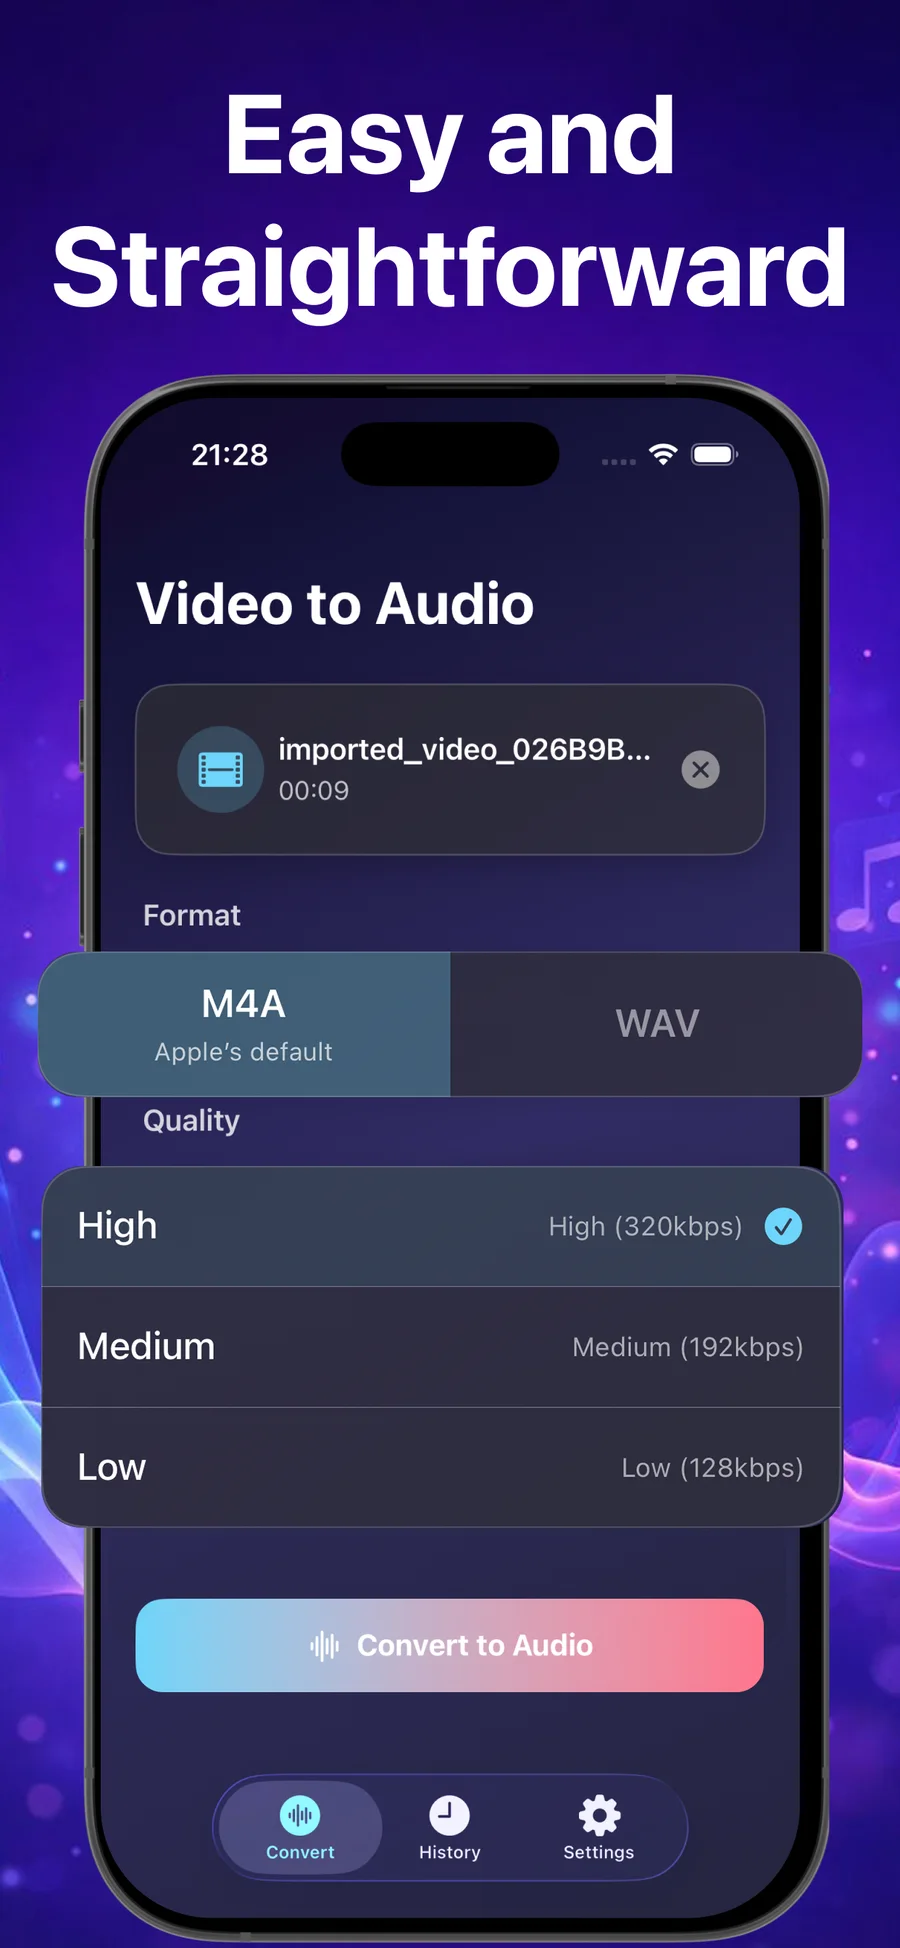
To convert a video to audio on iPhone or iPad, you can build a workflow in Apple Shortcuts or use a dedicated converter. Convert Video to Audio - Pro provides M4A and WAV choices, quality controls, local conversion, playback, history, and sharing in one screen.
Can you convert video to audio without another app?
Apple Shortcuts can accept media, transform content, and save the result to Files. This route can work well for an occasional conversion if you are comfortable creating and testing a shortcut. Apple explains how transform actions convert content and how share actions save files.
A dedicated app is more convenient when you want visible M4A and WAV choices, reusable quality controls, conversion history, and a player for checking every result without maintaining a shortcut.
Choose the video you want to extract
Open Convert Video to Audio - Pro and import a source video from your Photo Library or the Files app. Check the file name and duration before converting, especially when several clips have similar names.
Keep the original video until you have listened to the converted file. The output is a new audio file, so deleting the source is not required to complete the conversion.
Pick M4A or WAV
Choose M4A when you want a practical audio file for listening, sharing, or keeping on an iPhone or iPad. Choose WAV when an editor or destination specifically asks for that file type.
The format changes the kind of file you receive. It does not repair poor source audio or add detail that was not present in the original video.
Set the audio quality
Select High, Medium, or Low quality based on how you plan to use the result. High is a sensible starting point when the audio matters most. Medium or Low can be useful when file size is a higher priority.
- Use High for an important voice recording, lecture, or musical reference.
- Use Medium for everyday listening and sharing.
- Use Low when a smaller file is more useful than extra audio detail.
Start the local conversion
Tap Convert to Audio and let the app create the output on the device. The App Store description and official privacy policy state that processing happens locally and does not require an internet connection.
Conversion time depends on the source video and device. Wait for the result to finish before leaving the workflow or sharing the file.
Listen and check the result
Use the built-in audio player to play, pause, seek, and review the extract. Listen for the beginning and end of the file, and check that the part you need is present before sending it to another app.
Find, save, or share the audio
Converted files are available in the app's history with the file name, conversion date, and audio duration. Open a saved item to play it again, then use the share or save action when another app or Files needs the result.
- Import a video from Photos or Files.
- Choose M4A or WAV.
- Select High, Medium, or Low quality.
- Convert the video locally.
- Listen to the completed audio.
- Share or save the reviewed file.
Convert Video to Audio - Pro keeps video to audio conversion focused on local processing, format choices, quality controls, history, playback, and sharing in one workflow. Read the related guide for a closer comparison of M4A and WAV.